IMPORTANT NOTE: All merchants can set up post-purchase pages, but using custom app extensions like BON Loyalty requires a Shopify Plus plan.
What is Points on Post-purchase page?
BON Loyalty’s Post-Purchase Page feature lets Shopify merchants engage customers right after they complete a purchase. This tool enables personalized messages, rewards, and incentives on the order confirmation page, turning transactions into opportunities for repeat business and stronger customer loyalty.
How to enable points on the post-purchase page
To set up a post-purchase page for your store, follow these steps:
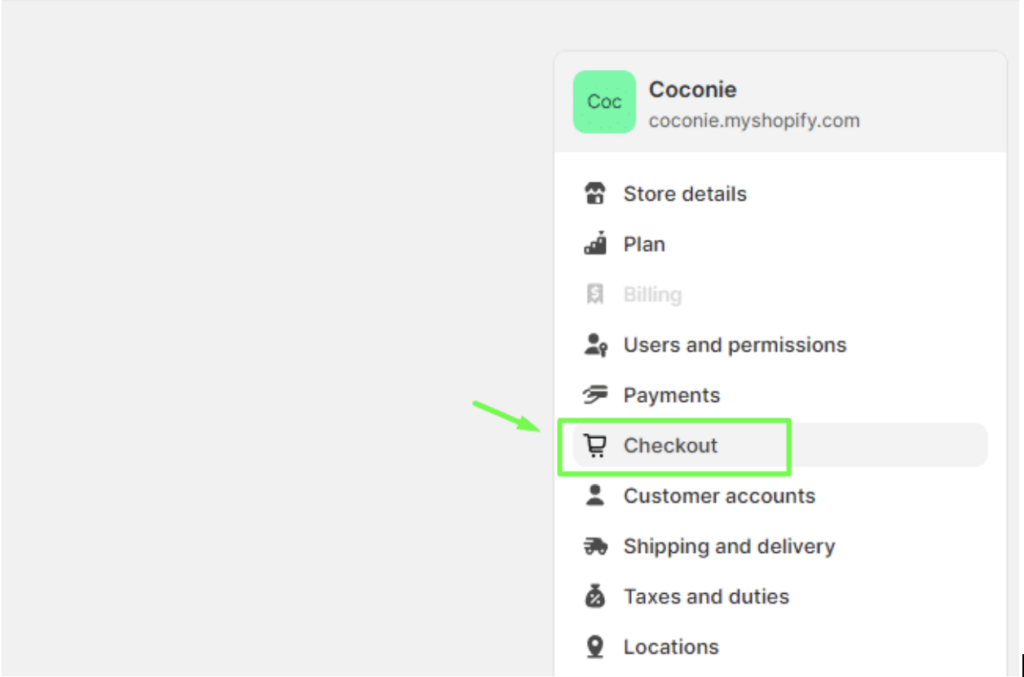
Go to Shopify Admin > Settings > Checkout.
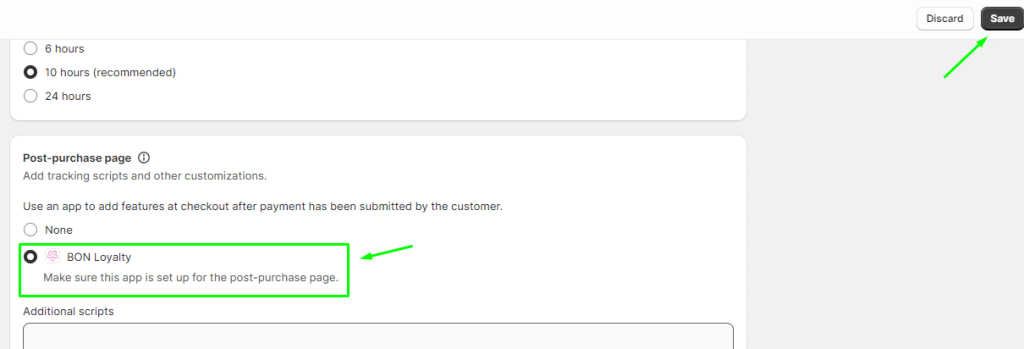
Scroll down to find the Post-purchase page setting > Select the BON Loyalty option.
Click Save to apply the settings.
What customers will see
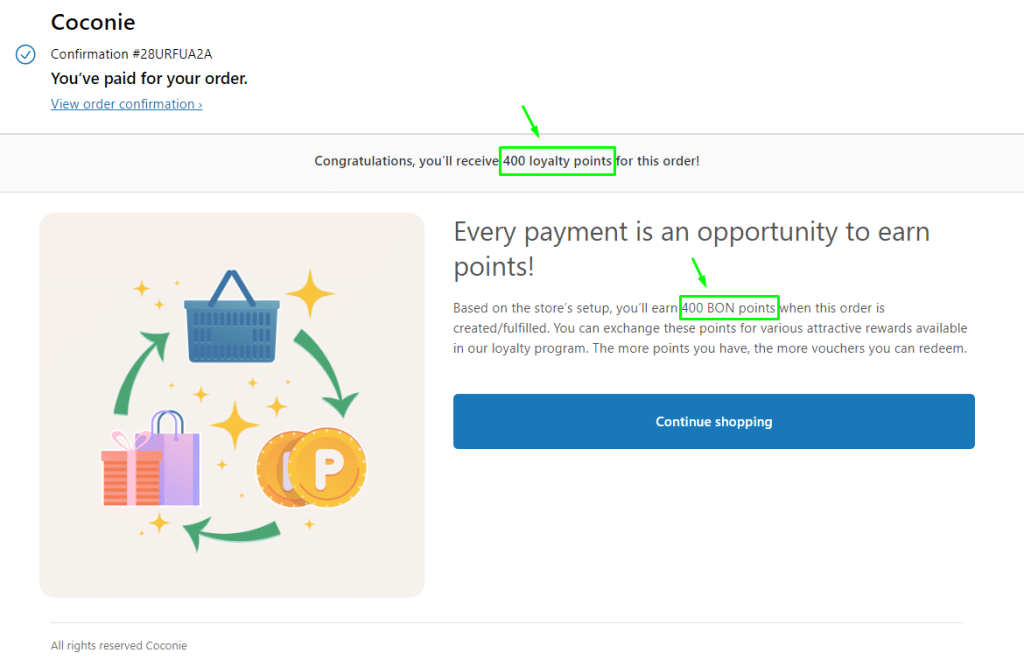
With the default Shopify post-purchase page, after completing the payment process, customers will see:
Order confirmation
Order ID
Payment notification
When the BON Loyalty extension is added to the post-purchase page, customers will also see a highlight of the benefits of BON, including:
The number of reward points they can receive from the order
Information on how these points can be used to redeem discount codes
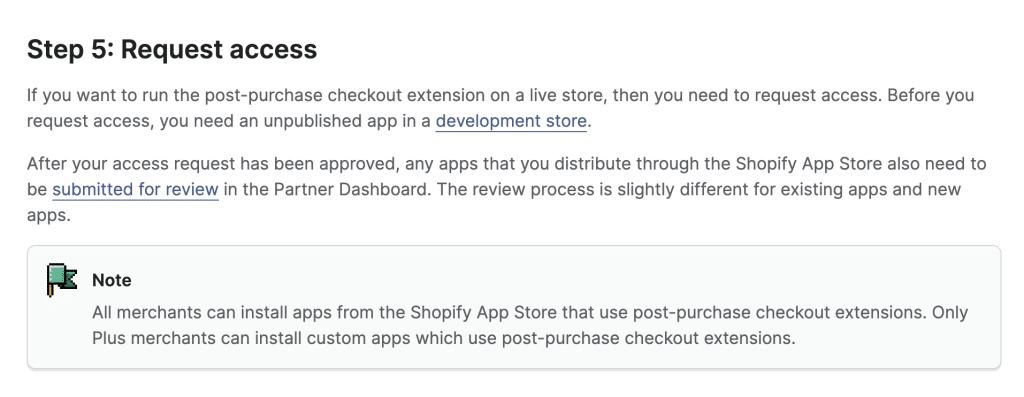
How to run the post-purchase extension on a live store
To run the post-purchase extension on a live store, refer to the detailed instructions provided in the Shopify Documentation.
How points are calculated
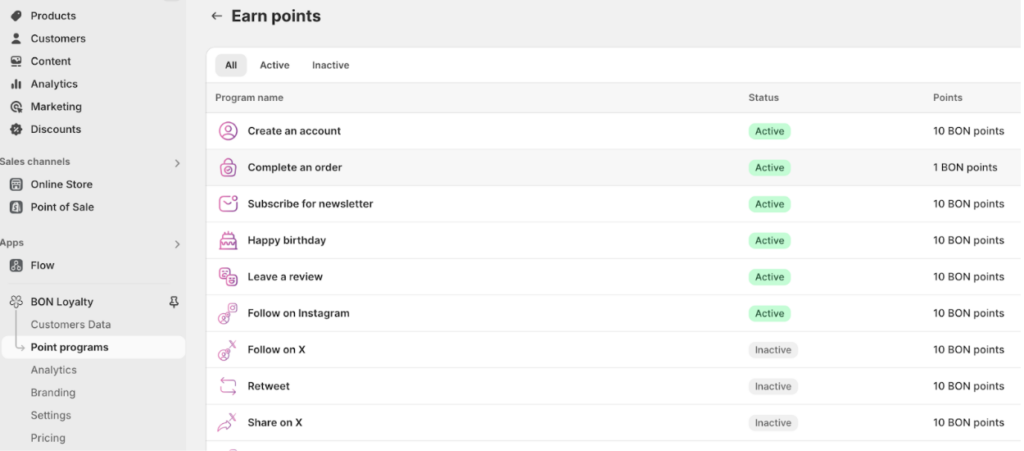
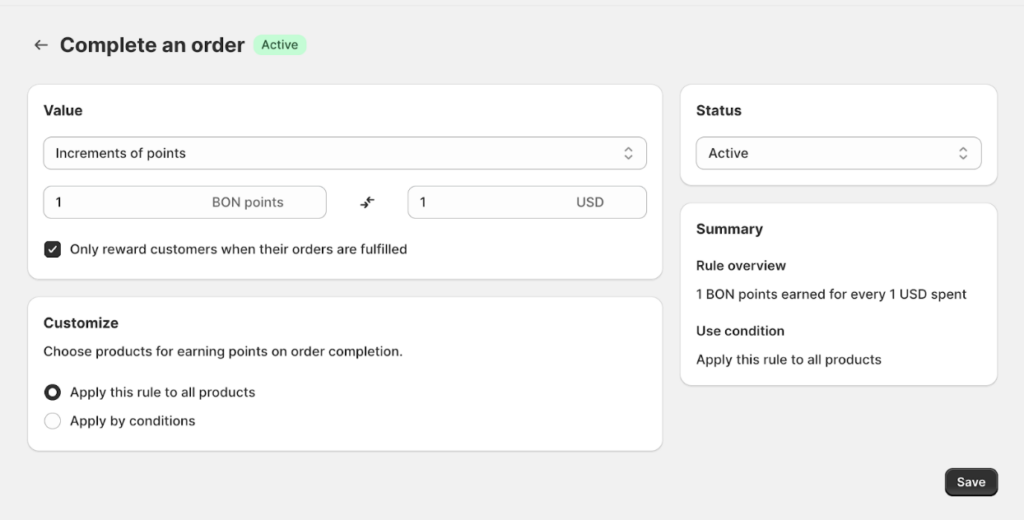
The number of points customers receive will be calculated based on the settings you’ve configured in the Complete an Order earn-point rule in BON. To check or edit this:
Go to Points program > Earn points > Complete an order.
Click Complete an order to adjust the point calculation settings > Click Save to apply the settings.