Customize your widget text
26 April, 2022Attribute explanation
26 April, 2022Notification emails overview
Learn how to set up notification emails to keep customers informed about their loyalty points, rewards, and more
Introduction
BON Loyalty allows you to set up various notification emails to keep customers informed about their points, rewards, Tier levels, and more. These emails are sent automatically right after each corresponding action takes place.
Overview
10 types of emails
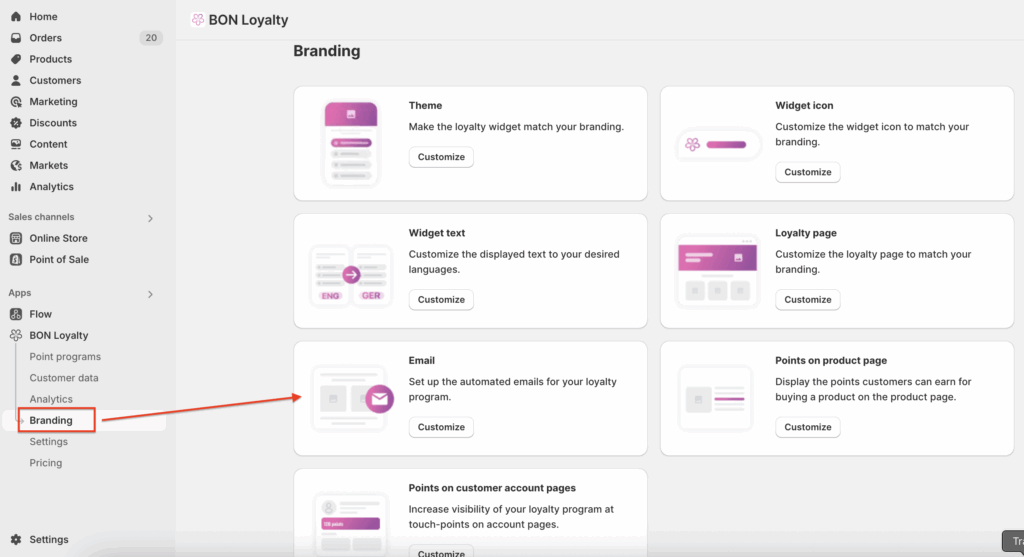
First, go to BON > Branding > Email to find this feature.
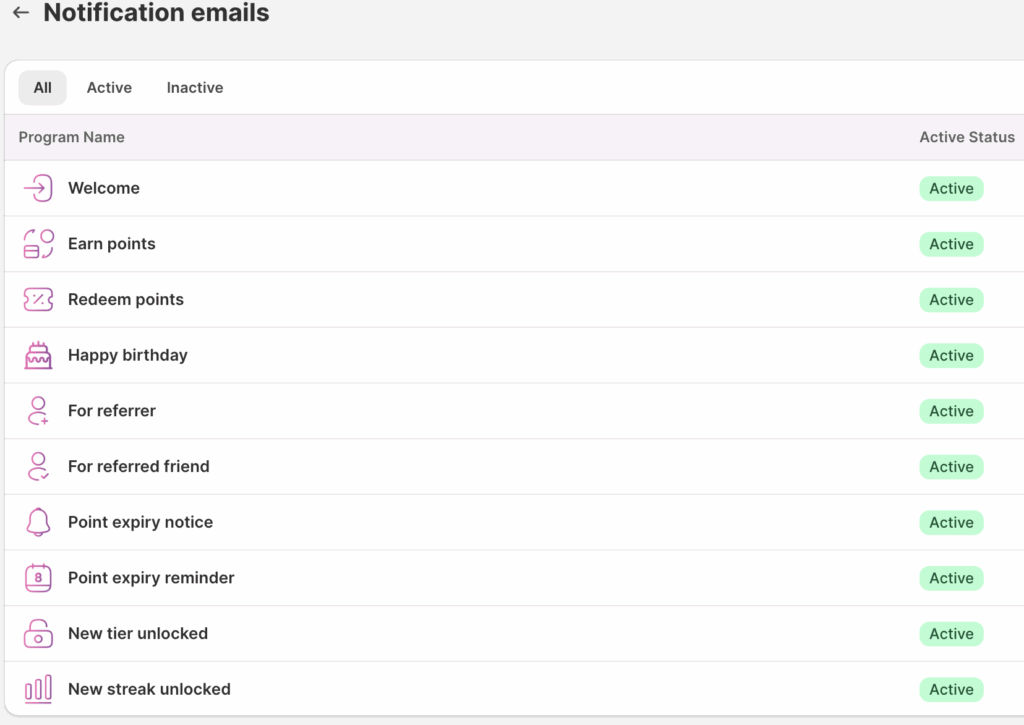
BON Loyalty offers 10 types of automated notification emails, sent to customers based on different loyalty actions:
- Welcome: Sent when a customer earns points for the Create an account action after signing up.
Earn points: Sent when points are earned from any point-earning action (excluding Happy birthday).
Redeem points: Sent when a customer redeems points for a reward.
Happy birthday*: Sent when birthday points are awarded.
For referrer: Sent when a referrer receives a reward after a successful referral.
For referred friend: Sent when a referred friend receives their reward after signing up via a referral link.
Point expiry notice*: Sent 7 days before points are set to expire.
Point expiry reminder*: Sent 1 day before points are set to expire.
New tier unlocked*: Sent when a customer is upgraded to a new VIP Tier.
New streak unlocked*: Sent when a customer completes an order streak through the Order Booster feature.
BON NOTE: Emails marked with * are available on our paid plans. Visit our Pricing plans to learn more.
How to customize emails
Click on each email type to edit them as needed. Once inside the email settings, select the corresponding tab to customize its details.
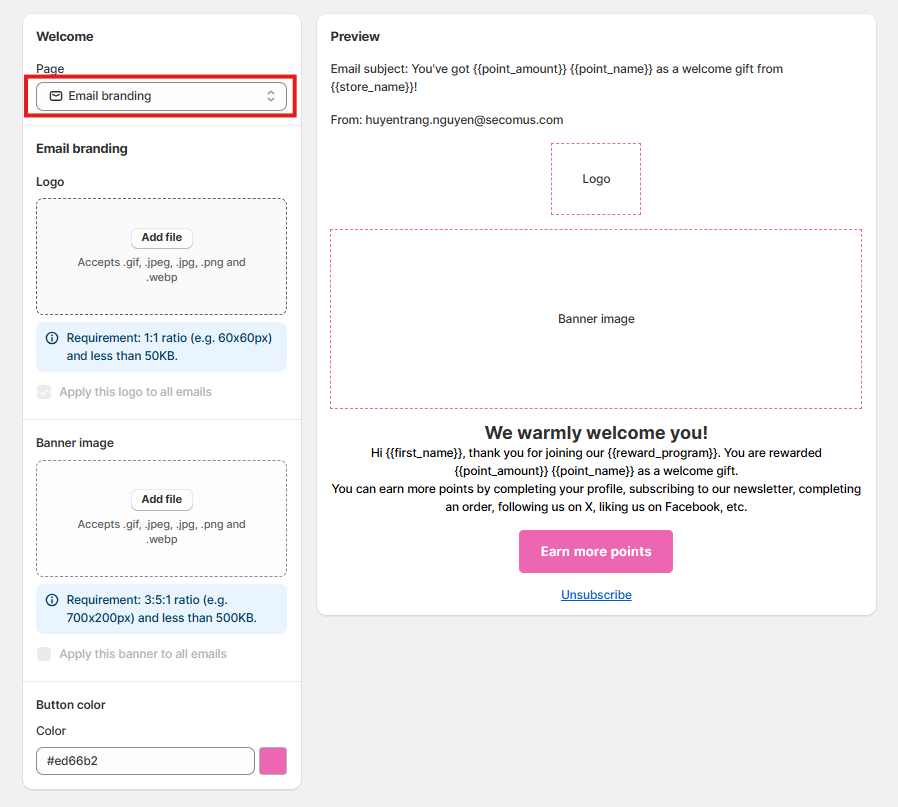
1. Email branding
Logo: Upload a square image with a 1:1 ratio (e.g., 60x60px) and a file size under 50KB.
Banner Image: Use an image with a 3.5:1 ratio (e.g., 700x200px) and a file size under 500KB.
Button Color: Select your preferred color for the email’s call-to-action (CTA) button to match your brand.
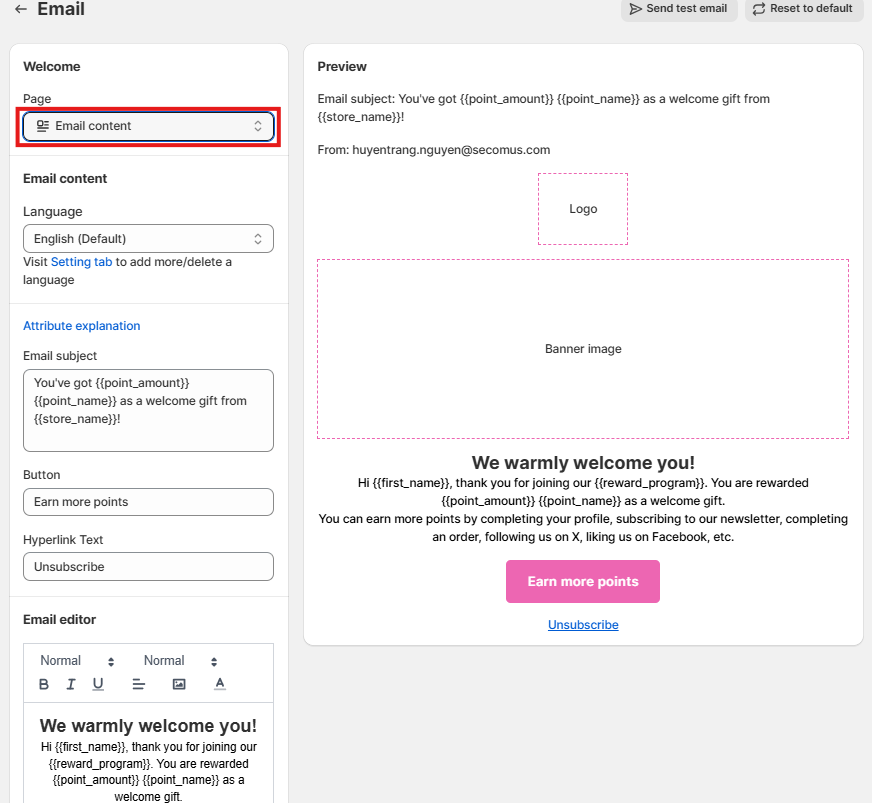
2. Email content
In the Email Content section, you can customize the message for each email type. However, please don’t edit the attributes, e.g., {{first_name}}, {{point_amount}}, and more, as these will automatically populate with each customer’s corresponding information when the emails are sent.
- Click here to learn more about email attributes.
- Send test email: Click here to send a test email to yourself and preview how it will appear to customers.
BON NOTE: The dynamic attributes in the email (such as customer name, points, etc.) will not update in test emails. These values only appear correctly in real emails sent to actual customers, as the system can only pull personalized data when a specific customer is identified.
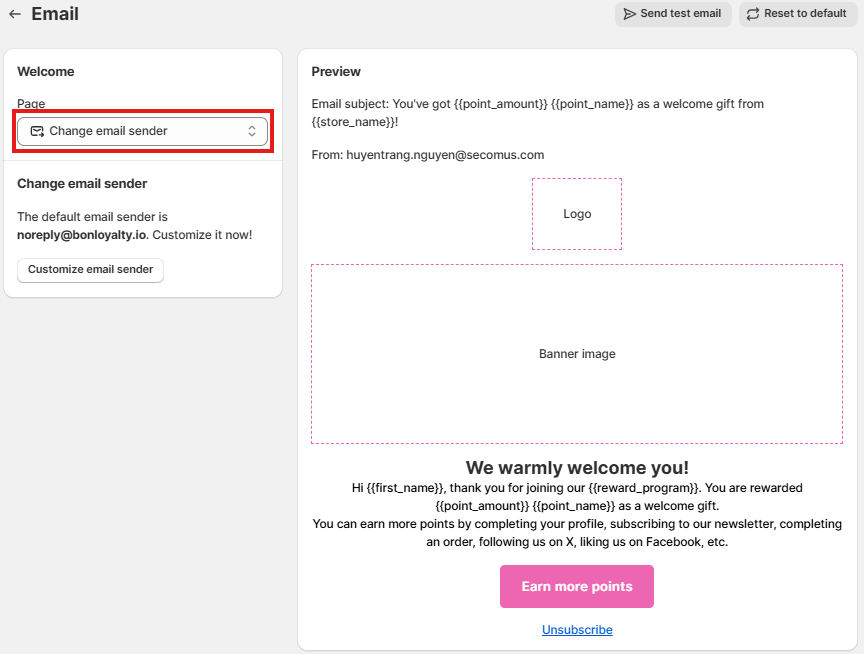
3. Change email sender
Click here if you’d like to change the default sender ([email protected]) to your own email address. Our live chat agent will assist you right away with the setup.
