Integrate with GemPages
26 April, 2022Email overview
26 April, 2022Customize your widget text
How to brand your widget content with the Widget Text feature
Introduction
For a successful loyalty program, customizing the content of your widget is essential. This allows you to target specific customer groups and tailor their experience. In BON, head over to Branding > Customize in the Widget Text section to begin personalizing your widget text.

Overview
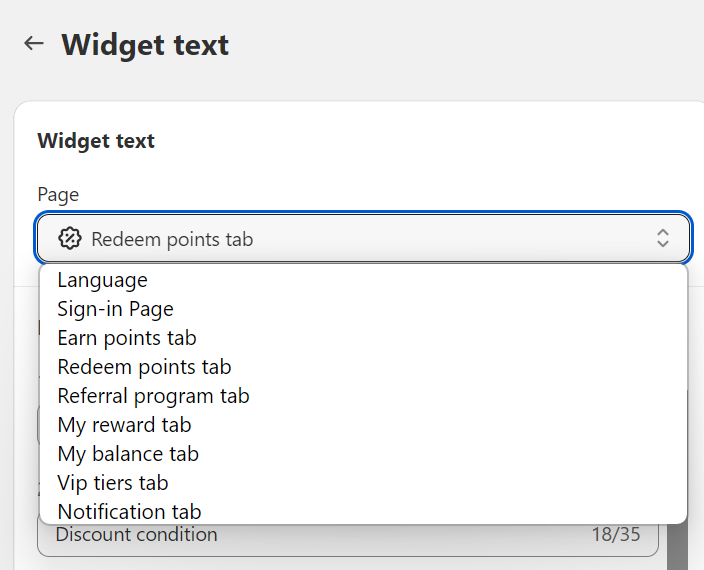
All sub-tabs in the Widget Text section
Each subtab includes content, which will be specially displayed in the widget for 9 scenarios:
- Sign-in page
- Earn points tab
- Redeem points tab
- Order booster tab (*)
- Referral program tab
- My rewards tab
- My balance tab
- VIP tiers tab (*)
- Notification tab (Content for pop-up notifications)
IMPORTANT NOTE: The VIP Tiers & Order booster features (*) are available in our Growth and Professional plans. Check out our pricing plans for more information.
Recommended content customizations
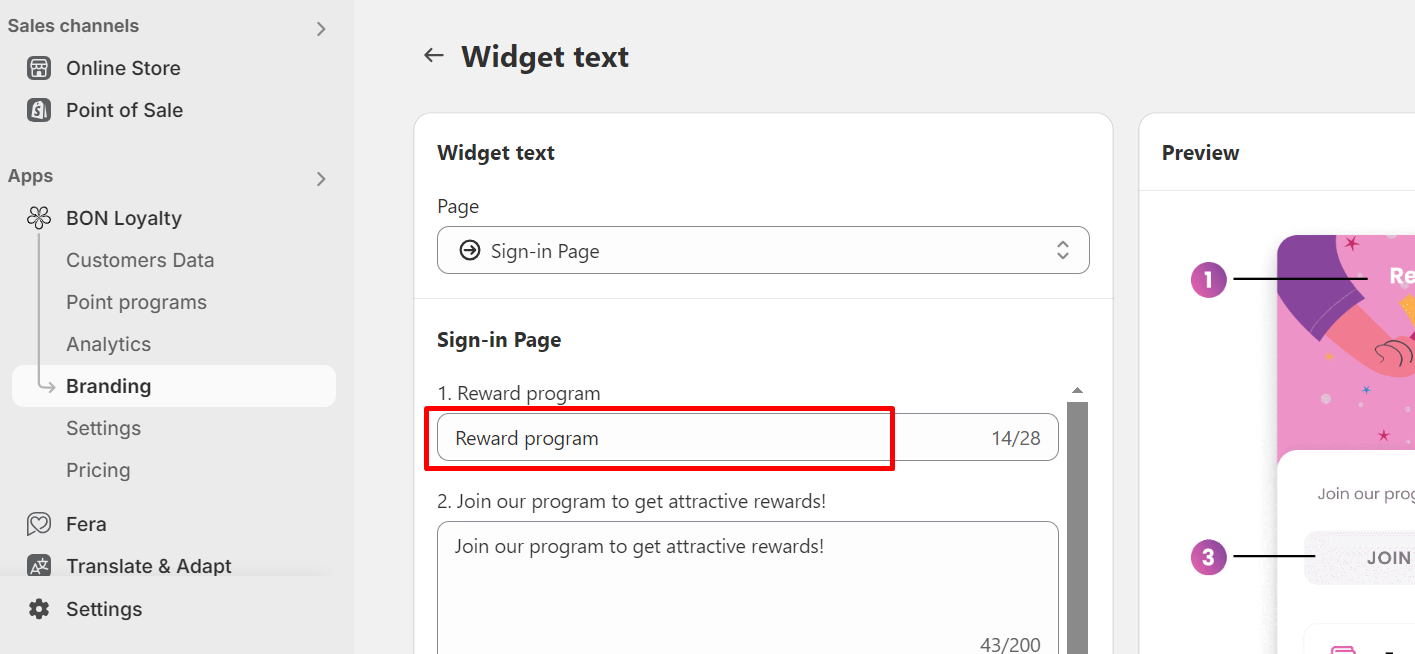
1. Loyalty program name
To change the name of your loyalty program, go to the Sign-in page sub-tab and edit Box 1: Reward program.
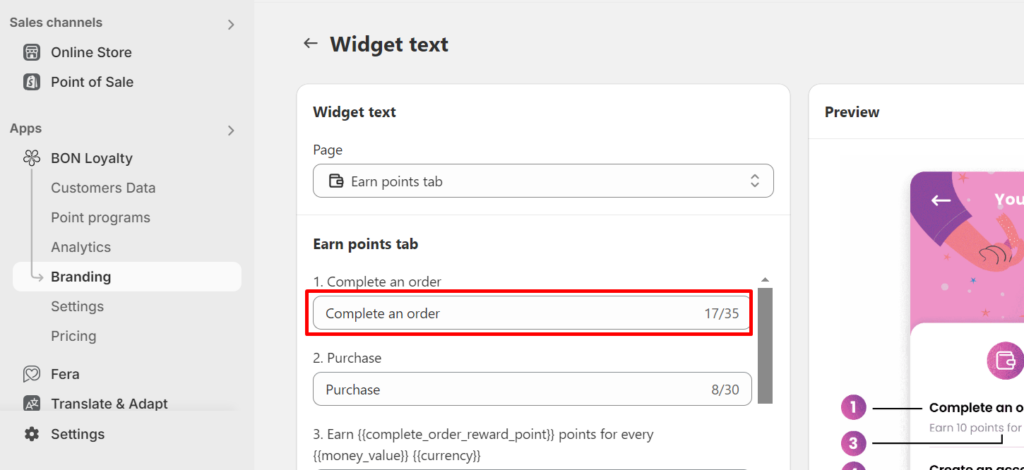
2. ‘Complete an order‘ widget text
Want to customize the default text ‘Complete an Order‘? Simply navigate to the Earn Points sub-tab, locate Box 1: Complete an Order, and update the text to fit your branding.
3. ‘Referral program’ widget text
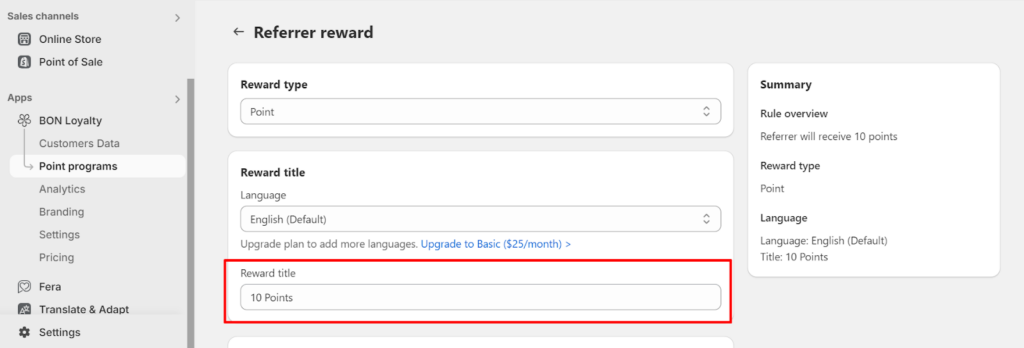
After configuring the reward offers and titles in your Referral program, you can customize the default text, “You/They will get …”. Simply go to the Referral program sub-tab and edit Boxes 3 and 4. Please ensure the placeholders {{…}} remain unchanged as they dynamically display the Referral reward titles.
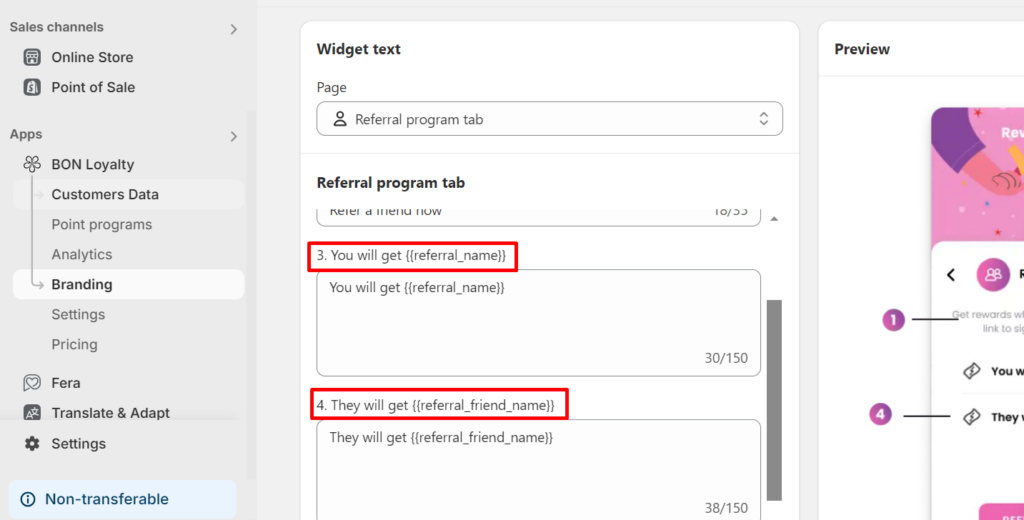
IMPORTANT NOTE: Make sure to set up the Reward titles in the Referral program so that this title automatically updates via the placeholders {{…}} in Boxes 3 and 4 above. To change the Reward titles, go to Point programs > Referral program > Click on Edit in each setting of the referral rewards > Change the Reward titles of each referral party.

